Showing posts with label KaiserCraft. Show all posts

Friday, 9 October 2009

Its been a long time between drinks . . . .

Wow, its been a while since I have been on here {blushing}.

I have been very busy and also very lazy!! I am teaching several days a week in the community now, so that keeps me on my toes. I teach knitting and crochet on Wednesdays and cardmaking on Mondays and twice on Thursdays. Next year I have the opportunity to teach a couple more days a week too, and hopefully that will pan out!

Since I am here, I thought I would share with you some things I have been creating and teaching. I have been away from my blog since March, so there is a lot to put up here! I will put it up over several days.

Also, its CC weekend at Little Scrapbook Shop this weekend, so I will pop my challenge up after it has gone 'live' (but that is another post :) ).

I also have some news on the Stampin' Up! front, but that is also a rant for another time.

Enjoy the photos to follow. Drop me a line and say hi - I'd love to hear from you.


This is a card created using bleach. (sorry, the pic is quite blurry - will fix asap)

Products used: Stampin' Up! stamps, RST verse stamp, Cuttlebug, distressing tool

The following cards were created for Little Scrapbook Shop.
Click on the photo to go to the forum for a closer look and product details.

This layout was created using an Artist Trading Card as the inspiration.
The gorgeous young man in the photo is Angus, the son of a good friend of mine, Jenni.
For a closer look and to see the rest of the collection I made using the set of ATCs,
click on the photo and it will take you to the LSBS forums where you will find
all the information about products etc.

This gorgeous calendar is a little something I created while away at Little Scrapbook Shop Retreat in August 2009. I love dragons and loved these chipboard dragons I found in the shop!
For more information about the products used, click on the photos and it will take you to the forums.

Saturday, 22 November 2008

Friendship Cards for LSBS DT

Hi there,
More creations - this time some friendship cards I made using some fabbo KaiserCraft stamps. Just LOVE LOVE LOVE the Kaiser clear stamp range!!!
Products used for all cards:
(additional products used are listed under the individual cards)
~ KaiserCraft Clear Stamps "Friends" + acylic block
~ Stazon Inkad - Jet Black
~ KaiserCraft Round Gems
~ Ribbons (some from stash, some available at LSBS)
~ Basic Grey patterned papers
~ Cardstock in various colours
~ Adhesives - mounting foam and doublesided tape
Additional products used:
~ Bella chipboard shape (thanks Jo)
~ Black Gel pen for doodling
~ Stampin' Up! Scallop border punch
(available from 1st December!)

Additional products used:
~ Black Gel pen for doodling
~ Stampin' Up! Scallop border punch
(available from 1st December!)

Additional products used:
~ Plain white cardstock
~ Pink inkpad (for the edges of the white circle and around the edge of the white card)

Bye for now,
Deanne
xx

More creations for you

Hi all,
This is the first of a few posts today - I am just popping up some things I have recently created.

First up is my Gingerbread man Countdown Calendar. I was inspired by Kerryn's Countdown Gingerbread men calendars, so had to make one of my own.

Products used:
(all links will take you to the Little Scrapbook Shop shop)
~ KaiserCraft OTP Wooden Gingerbread man album (thanks Jenni)
~ KaiserCraft Paint (green - thanks Jenni)
~ KaiserCraft 12x12 Christmas paper (mine was from last year's range, but there are some lovely papers in this year's range)
~ Silver rings (KaiserCraft have silver and lots of other colours too)
~ Ribbon from stash
~ Various Rub-ons from stash
~ KI Memories Little Softies
~ Large brads (with the prongs removed with shank pliers)
~ Adhesives - Pritt Power Gel and Pritt power glue stick
~ Rik rak from Jenni's stash (check out the rik rak in the shop here)
~ Crop-a-dile and large eyelets (from stash)
~ white cardstock and cold laminate (clear self-adhesive vinyl)
~ The little xmas tree and lollie etc are from a $2 pack of wine glass charms from a bargain shop.


Some techniques used:

Used Pritt glue stick to adhere paper to the gingies after I coated them with green paint.
The eyes are made from large brads which had the prongs removed with a button shank removing tool. They are stuck on with the Pritt Power Gel (I LOVE this stuff!!!!!)

Have a great day!
Deanne
xx

Tuesday, 18 November 2008

Christmas Cards

Its that time of the year - Christmas madness is nearly upon us. I have been making lots of Christmas cards using my LSBS DT pack. Loved all the products in here (as always!!!).

As always, you can click on the images for a larger view. All links will take you to the LSBS shop.

Deanne
xx
Merry Medallion
Products used:
~ KaiserCraft Clear Stamps "Flowers" & Christmas
(sold out - sorry I bought the last one) but there is different set HERE + acrylic block
~ Versamark inkpad
~ Silver embossing power
~ Blue cardstock
~ Adhesives - mounting foam, double sided tape, Pritt Power Gel
~ other - silver border stickers

Techniques:
~ Stamped the flower image 3 times onto dark blue card with the versamark and heat embossed with the silver embossing powder. (Helen has a great tutorial HERE for heat embossing). Cut out 2 whole images and one of just the central flower of the image, them layered them, medallion style, with mounting foam.
~ Stamped and embossed with silver the Merry and Christmas onto dark blue card and cut out close to the image.
~ Used the border stickers to frame the card.

Christmas Cards
Products used for all cards:
(Additional products are listed under the individual cards)

~ Bazzill Cardstock (red, green, cream)
~ Fancy Pants Ribbon, The Daily Grind, Ball Trim
~ American Crafts MiniMarks Rub-Ons - Christmas Book One
~ Adhesives: mounting foam, double sided tape

Christmas BaublesAdditional Products used:
~ Grossgrain Ribbon - Red
~ KaiserCraft round gems
~ Basic Grey PP - Wassail "Sleigh Ride" (the reverse side)
~ Other - Thin gold wire from stash

Techniques:
Baubles rubbed onto red cardstock and cut out. Stuck on kaiser gems to embellish, mounted with the foam tape. The ric rac is also a rub-on. The wire curls were made with 26 gage craft wire.

Red & Green ChristmasAdditional Products used:
~ Basic Grey Clear stamps - Tannenbaum + acrylic block
~ Grossgrain Ribbon - Red
~ KaiserCraft Pearls - Red
Other - Red star from stash, Olive green inkpad

O, Christmas TreeAdditional Products used:
~ Basic Grey Clear stamps - Tannenbaum + acrylic block
~ KaiserCraft Pearls
Other - Red star from stash, Olive green inkpad


Creating update

Hi all,
Have been MIA due to issues at home. All seems to be settling down now so I am in the mood to update.

I have been busy creating for LSBS with the latest 2 kits I have received. Just love all the products and haven't really had to add too much. All links will take you to Little Scrapbook Shop store.

As always, you can click on the images for a larger view.

Enjoy.

Deanne
xx
Teddy Broach Birthday Card

broach detail (can you see the pin?)
This little card would be ideal for an older little girl (or boy) who could take the broach off the card and wear all day on their birthday!

There is a little story behind the bear. . .

While I was away at my girls' weekend away in November, we were having a pajama party on the Saturday night. We were supposed to bring our teddy bear with us, but I forgot mine so I had to make one. So, I stamped up the teddy and turned him into a 3D broach that I wore on my jammies!!

The next day, we were having a pink card competition, and I thought that my teddy would make a lovely embellisment/gift on a card, and that's how this card came to be!!

Products used:
~ KaiserCraft Clear stamps - Birthday + acrylic block
~ Stazon inkpad - jet black
~ White gel pen
~ Adhesives - Mounting foam & Dimensional medium (to stick the pin to the back of the bear)
Other - Lucy's Bear stamp, silver border stickers, patterned papers

Techniques: Paper tole to create the teddy (stamped several bear images then cut out sections to create a 3D image, adhered with mounting foam); the words were highlighted with the white gel pen

Birthday CardsProducts used for all cards:
(additional products used are under the individual photos)
~ KaiserCraft card pack - red
~ KaiserCraft Clear Stamps "Birthday" + acrylic block
~ Stazon inkpad - jet black
~ American Crafts Celebration papers


Cupcake BirthdayAdditional Products:
~ American Crafts Celebration papers
"Disco Ball", "DJ" and "Truth or Dare (both sides)
~ American crafts MiniMarks rub-ons "Celebration Book 2 colour"
~ KindyGlitz - Crystallina
~ Adhesives - Pritt Power Gel, double sided tape
Other - clear plastic

Techniques:
Cupcake stamped onto the clear plastic, stamped onto various patterned papers, cut-out and paper pieced onto the clear plastic.
Birthday circle stamped onto the pp then cut out and stuck onto the plastic. Happy birthday rub-on is also on the clear plastic.

Hip Hip HoorayAdditional Products:
~ American Crafts Celebration papers "Pinata" and "Cocktail" (I used both sides)
~ KaiserCraft round gems
~ American crafts MiniMarks rub-ons "Celebration Book 2 colour"
~ Black gel pen

Techniques:
Cut strips of PP and inked the edges with the black inkpad.
Stamped the circle stamp onto PP, cut out, distressed the edge with my fingernail then with the black inkpad.
Hip hooray was stamped onto 2 different colours, cut out and then the centre mounted with foam tape.
The stars on the card are rub-ons, which I have then traced around with the black gel pen to make them stand out more.
The edge of the red card is distressed with the black inkpad.

Birthday PresentsAdditional Products:
~ American Crafts Celebration papers "Musical Chairs"
~ KaiserCraft round gems
~ Black gel pen
~ Adhesives - doublesided tape, mounting foam
Other - white cardstock, watercolour pencils

Techniques:
Presents were stamped onto white cardstock then coloured and cut out. Mounted with foam tape and decorated with bling and kindyglitz.
Doodling (the border) and around the presents to make them stand out.
Distressing - the edges of the red card were distressed with the black inkpad.

Tuesday, 7 October 2008

Hi Bloggers!!

Today I am sharing some cards I created while I was at my mum and dads in the October school holidays.
Melissa's Birthday Card
Butterfly Quote Card
Thank You Card for Mum & Dad

Products used:
(all links will take you to Little Scrapbook Shop)
~ KaiserCraft Flutterby patterned papers "Long Wing" and "Monarch"
~ KaiserCraft Round Gems
~ Stazon Inkpad Jet Black
~ Pink cardstock
~ mounting foam
~ Black gel pen

I will pop some more up later on.

Have a great day!

Deanne
xx

Thursday, 2 October 2008

Little Scrapbook Shop DT Challenge

Howdy bloggers,

Just sharing some cards and tags I made for Little Scrapbook Shop. The team was given a challenge pack to work with, and these are what I came up with. As always, you can click on the images for a better view.


Recipe (Note that all links will take you to Little Scrapbook Shop)

~ Bazzill Smoothies - Cherry Red & Apple Crush
~ Bazzill Christmas Pack
~ Rhonna Farrer Christmas Felt
~ Sandylion Christmas Embellishments
~ KasierCraft Clear Stamps - Flourishes and Flourish Journals
~ Stazon Inkpad - Jet Black
~ American Crafts Mini Marks Rub-ons - Christmas Book 2 Black
~ KaiserCraft Round Gems
~ Gel pens - white & Black
~ Adhesives - Express It tape & Pritt Power Gel
~ Stitched Ribbon

Techniques used:

For the red card with "seasons greetings" - to get the scalloped edge, I just drew a line of scallops and cut them out with my scissors, then used a crop-a-dile to punch the holes along the row. Easy peasy.

For the 'happy holidays' and 'deck the halls' cards, the felt comes with little holes punched in them, which are the perfect size for the kaiser gems.

Saturday, 20 September 2008

ATC Swap shares

Hi everyone!
Today I am sharing some more ATC's I finished in the last couple of days. Sorry about the crappo quality of the photos, for some reason my camera really hates the quality of the light at 1.30pm in the afternoon. Will try to get some better photos later on.

In the meantime, here they are for your enjoyment (sort of lol)

This one is for the Swirly Curly swap on No Crap Just Scrap Yahoo Group.
Products used:
Flourishes (KaiserCraft Clear Stamps)
Butterfly & Lady bug from Garden 2 (Pink Cat Studio)
KaiserCraft Round Gems
Glossy Accents
White Gel Pen

This one is for the Vintage swap for the Little Scrapbook Shop ATC Club.
Products used:
Little Girl unmounted stamp (The Stampsmith)
Text stamp unmounted (The Stampsmith)
Sepia Inkpad
Prima Flowers
Brads (unknown)

Thanks for visiting today. Hope you are having a great weekend.

Deanne
xx

Monday, 15 September 2008

More Friendship Cards

Good morning!
Today I am sharing some more friendship cards I made for Little Scrapbook Shop.
Enjoy.

All links will take you to Little Scrapbook Shop.

Products used for all cards:
~ KaiserCraft Card Pack - blue
~ Bazzill Basics cardstock - pink
~ KaiserCraft Pearls
~ Kelly Panacci Clear Stamps "Friends" & acrylic block
~ Stazon Inkpad - Jet Black
~ Adhesive- Express It double sided tape
Additional products are listed under the individual cards

Elegant Friends

Additional Products used:
~ KI Memories Bloom Frosty Lace cardstock "twirl white"
~ Autumn Leaves French Twist pp - "Blue Twist"
~ Mini rik rak - blue
~ Black & white gel pens
~ Adhesives- mounting foam, Pritt Power Gel (to adhere the rik rak)

Techniques:
~ Trimmed the lace cardstock and adhered to the 'blue twist' pp. Trace around the pattern with the black pen then around the edge of the piece with the stazon inkpad.
~ stamped 'friends' onto a scrap of pink bazzill in black, then drew around the outside with a white gel pen. This panel is then adhered with foam tape

Flower Friends
Additional Products used:
~ Cactus Pink Ribbon "Race"
~ Mini rik rak - blue
~ Prima flowers

Techniques:
~ Stamped the words repeatedly onto the pink bazzill.
~ Adhered the wide ribbon to the lower part and then used the blue rik rak as a border.
~ went around the edges of the bazzill and base card with the stazon inkpad.

Best FriendsAdditional Products used:
~ KI Memories Frosty Lace cardstock "flutter white"
~ Basic Grey pp Euphoria "Elysian"
~ White gel pen

Techniques:
~ Trimmed 2 butterflies from the lace card stick and adhered them to the Euphoria pp along their bodies. Bent the wings a little to shape them
~ Used the white gel pen to colour in the word "best" and traced around the outside of the word "friends"
~ went around all the edges with the stazon inkpad.

Saturday, 13 September 2008

New Stamps!!!!!!!

Teehee!! I just love stamps!!! Did you know that????? hehehe.

Yes, of course you did lol. Well, I recently got myself some of the fabbo new KaiserCraft range of clear stamps. Just love clear stamps. Well, I love ALL stamps, but acrylics are my current love (obsession).

I bought these great stamps over at Little Scrapbook Shop. They are great value and I find the Kaiser stamps really good quality.

Sorry, some of the photos are not very good (I was not well when I took the photos).

Can't wait to play with these ones!!!!

Have a great day!

Deanne
xx

Friday, 29 August 2008

Inspirational Thoughts & Quotes Book

Good Morning,
Today I am sharing a little book I decorated last night. This is for me to write down inspriational thoughts and quotes that I come across, and also for my friends/family to write things in for me too.

You can click on the images for a larger, clearer view.

Front Cover
Front Cover Detail
Inside Front Cover
Products used (all links will take you to Little Scrapbook Shop):

Front Cover

Basic Grey pp - euphoria "elysian"
Basic Grey clear stamps "swirlie"
Basic Grey clear stamps - "grow-a-garden" (back in stock soon) & acrylic block
Stazon inkpad - Jet Black
Kelly Panacci cardstock stickers "Artsy"
Bling
Black Gel pen
KaiserCraft Acrylic paints - Coastal Blue, Magenta, Pretty Pink, Lime & Mauve
KI Memories Softies "tiny accents" (butterfly)
Dimensional medium
Adhesives - express it tape & pritt power gel
Other: Ribbons from stash, sanding block, A5 sketch pad from $2 shop, clear plastic to protect the cover.

Inside Front Cover
Basic Grey pp - euphoria "bless"
Basic Grey clear stamps - "grow-a-garden" (back in stock soon)
KaiserCraft clear stamps - "Flourish Journals"
Stazon ink pad - Jet black + acrylic block
Black journalling pen
Adhesives - express it tape & pritt power gel
Other: Distressing tool

Techniques used: stamping, freehand doodling, distressing & journalling.
I sanded both sides of the plastic cover of the book to ensure my tape stuck to the surface. It is too slick otherwise and the tape wouldn't hold.
Paint was applied roughly with my finger around the sanded edges of the pp on the front cover. Two coats of DM were applied over the word "art".
The edges of the pp on the inside front cover were distressed with the distressing tool.

Credit for this idea goes to my friend Jo, who wanted to sign my "Celebrate the Little Things" book from retreat. As that particular book is for my own personal stuff, I needed to create a new book for my friends to write in. Thus, this book was created! Thanks Jo, for the inspiration!!!

Monday, 21 July 2008

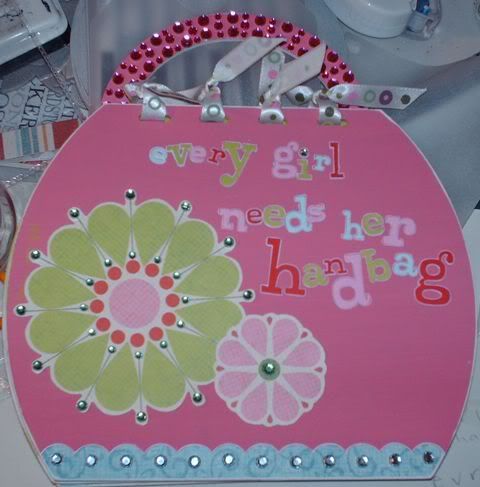
Every Girl Needs Her Handbag

Good morning bloggers.
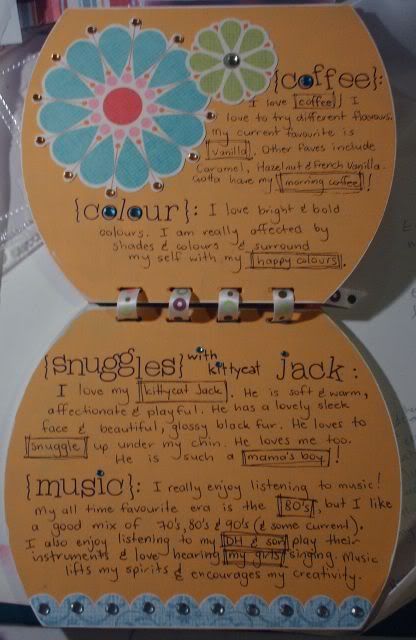
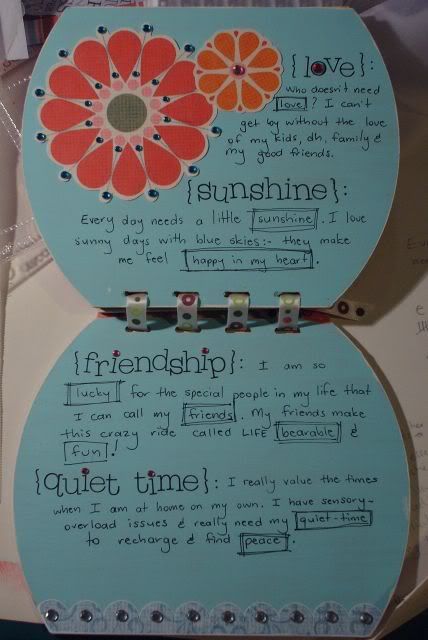
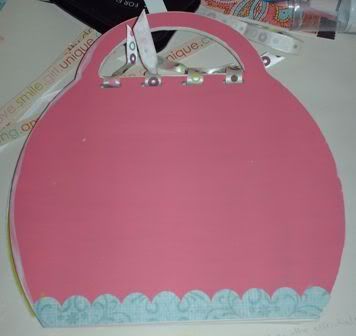
I have just finished creating an OTP album as part of my Design Team work for Little Scrapbook Shop. This was really fun to do.


Here's what I used to create the album (everything is available at Little Scrapbook Shop).

Kaiser Wooden OTP - Handbag Album
Kaiser Paints: Candy, Lime, Mango, Spearment and Antique White
Kaiser Round Rhinestones in various colours
American Crafts Alpha Stickers "Whistle Stop"
MME Patterned papers - "Just Dreamy - Day Dream in Bloom" & "Lush Blooms - Clear Skies"
MME Accessory sheet - "Garden Party - Lush Blooms"
KI Memories Ribbons (to hold the album together)
American Crafts MiniMarks Rub-Ons - Ned Jr (black)
White & Black Gel pens
Adhesive - Pritt Power Gel.

Have a great day,
Deanne
xx