Saturday, 30 July 2011

Zentangle - the value of shading.

Hello bloggers! Long post today, so bear with me - its been a while.

Hope you have all been well and happy! I have been happily tangling - mainly to try to preserve my sanity as my 2 daughters squabble and argue with each other constantly! They can be complete angels or complete devils and lately they have been wearing horns rather than halos! My favourite thing to say at the moment is "There is a girl with a curl, right in the middle of her for'd. When she is good, she is very very good, but when she is bad, she is horrid!!" This applies to both my girls (and to me too, I believe lol).

But I digress...

My post today is about the value of using shading on your zentangles. I have been meaning to scan my tangles before I shade them as well as after, to demonstrate the value of shading. However, I am usually so in the zen-zone that I don't remember until after I have finished. So, today I managed to do it.

The Zentangle Inspired Art yahoo group to which I belong, is about to run another bingo game (called Zengo!) and the 'fee' to enter is to complete a 3x3 grid sampler of tangles, that we choose from a list of 60. I chose 8 that I hadn't tried before and one that is a fave (Puf).

The 1st image I have here is the completed grid, minus the shading. I really love to use shading, as I love the depth you can achieve just by adding a smudge of shadow. I could never leave a tangle unshaded (at least, not for long) because it just looks so incomplete to me.

The 2nd image is the finished sampler, complete with shading. See the difference? It is amazing, isn't it, how something as simple as a bit of shading can enhance the finished appearance so much (you can click on the images for a larger view).
I know a few people who are afraid to add shading to their tangles, for fear they might 'wreck' them, or not do it 'right'. Folks, there is no right or wrong! If you like how it looks, then its 'right'. Don't be afraid - its only pencil and there are plenty more tangles inside of you waiting to come out.

There are no mistakes, only opportunities to learn.

My advice to anyone who fears to shade - pick up a pencil and just go for it. I use a 2B or a 4B pencil and very light pressure when shading - if I am too heavy handed I simply rub it out and re-do. The softer pencils are much easier to rub out than HB pencils. Again, there is no right or wrong way to do it. You can shade using a 'light source' (like I did for 'Nipa', where the light is coming from the north-east) or you can shade where the light appears to be coming from straight above (like in 'Eiffel' and 'Zingiber') or you can just shade however you want.

I like my art to appear 3 dimensional - I do the same when colouring in stamped images for cards. It's just my style. You don't have to shade your tangles, but you have to admit, it makes a world of difference.

Give it a try. You won't be sorry you did.

Take care and ciao for now,

Saturday, 16 July 2011

Tangle a Day #7

Hello out there in blog land,

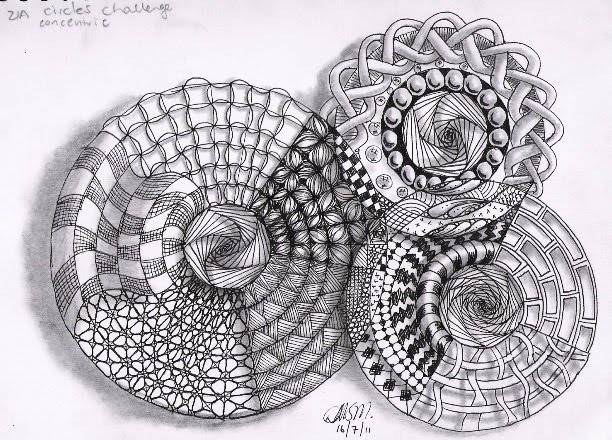
I have been doing so much creating lately - some for the Teapot Tuesday challenges at SplitCoastStampers, some Design Team work for LSBS, and today, just for me, a Zentangle inspired challenge. One of the challenges at Zentangle Inspired Art yahoo group is to create a ZIA tangle with concentric circles.

Here is my take on this, even using my 'Celtic' tangle (for which you can find the instructions at www.tanglepatterns.com). I really enjoyed this. It took me a couple of relaxing hours to do and it was perfect for clearing out my brain. What a great challenge.
(you can click on the image for a larger view)
Thanks for stopping by.

Take care and ciao for now,

Tuesday, 12 July 2011

Zentangle Inspired Art ATC Swap 2 - If the Shoe Fits

Yesterday I popped up the ATCs I did for the butterfly ZIA swap. Today I have some the 2nd swap "If the shoe fits!". I have hand drawn the jester shoes (I love jesters!) and tangled them. The 2nd ATC I am calling "Cosmic Jester" cos to me it looks like it's in space.
The last one is the hostess gift for Esther for hosting the swap. I am really happy with these.
Enjoy.
Take care and ciao for now,

Monday, 11 July 2011

Zentangle Inspired Art ATC Swap

Just recently, I joined a terrific Yahoo group called Zentangle Inspired Art. They are a wonderful group of folks who love to tangle too. I immediately signed up for a couple of swaps that close at the end of July.

I have completed the first swap (Butterflies) and have posted them off to the USA. I am really looking forward to the returns. In the meantime, I thought I would share with you those small pieces of art. The first three ATCs are for the swap. The 4th is for the hostess to keep, as a thank you for running the swap.

Enjoy.
Take care and ciao for now,

Sunday, 10 July 2011

How to Tie a Bow - tutorial

Would like to know how to tie a bow? There has been some chit chat on LSBS recently about people's ability (or not) to tie one. Well, if you are one of those who would love to learn how, then pop over to the forum to see the first of a short series of tutorials on bows.

I am first up, with a ribbon bow. You can see the step by step >> HERE <<
Take care and ciao for now,

Saturday, 2 July 2011

Shabby Flower Tutorial

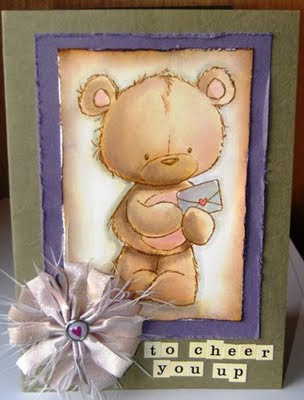
I was asked by a few people how to make the flower on the cards I created the other day (seeTHIS post).

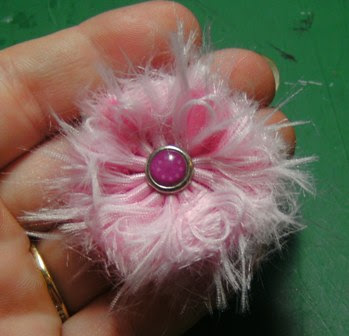
So today I have created a quick step by step tute, showing how I made them. Pop over to the forums at Little Scrapbook Shop >>> HERE <<< to find out how.
Take care and ciao for now,

Friday, 1 July 2011

New Monthly Challenges over at LSBS

Looking for something to challenge you and cheer you up during these cold winter days?

Well, look no further than Little Scrapbook Shop, where we have the first of our monthly challenges ready for you!!

Challenge 1 is mine - its a colour and cardmaking challenge and here are the 2 cards I made which meet the criteria. . .
Challenge 2 is by Lauren - its a sketch challenge and what a great sketch it is too.

Head over to the Little Scrapbook Shop Forums for all the details. There is a great prize for each of the challenges and you have a whole month to get them completed.

Hope to see you there.

Take care and ciao for now,

Wednesday, 22 June 2011

Tangle-related post

If you are new to tangles and are using micron pens for the first time, then there is some great information at TanglePatterns.com today from Sakura, which will help you get the best out of these pens and ensure they have a longer life.

Click >> HERE << to go to the post.

Take care and ciao for now,

Monday, 20 June 2011

Tangle a day #6

Welcome to another tangle. I don't always have a lot to say about these. I love to look at tangles all over the web and I do enjoy other people's stories about how their tangles have come about. Mine just happen and I don't always think about the process. I just do it. And I don't analyse my work after I am finished. I just sit back and admire it hehehe.

So, on that note, here are some tangles for you to sit back and admire too {{wink}}
Take care and ciao for now,

Saturday, 18 June 2011

Tangle a day #5

Good morning (well it is in Sydney :) )

Today I am sharing 3 tangles with you. As I have been learning new patterns, I have enjoyed trying them out in tangles. I have a few that are real favourites, but I do love seeing how each new pattern works with others.

In this tangle, I was trying out Zenplosion folds (the one that looks like a scroll) as well as a few others. I have always enjoyed the swirly look of scrolls, so adding them to a tangle was fun.


Just some more playing with this one


This tangle was my first larger sized one (created in my A5 art diary - my TangleBook). I really like working on a larger scale and now have an A4 sized TangleBook and I really love the result I got working on such a big scale. More on that in a post to come - keep a look out.


If you are interested in learning some tangle patterns, head on over to Tangle Patterns [dot] com. There are oodles and oodles of doodles to choose.

A bit of trivia: You may (or may not) have noticed my initials have changed too. My married name is hyphenated, but I had been DMS for so many years that I didn't want to add the extra M on the end. However, after talking to my mum and a couple of friends, I realised that I really ought to included the extra letter at the end, hence, I am now DMSM. I should have realised it would seem ok, after all, my daughters' initials are MRSM and EJSM. I actually enjoy signing my work with the 4 initials. So there you go. :)

Anyway, I hope you have enjoyed your visit today.

Take care and ciao for now,

Thursday, 16 June 2011

Tangle a day #4

Welcome to a cheery post on this wet, cold and windy afternoon in Sydney. Hopefully we will have some sunny days for the weekend.

Anyhoo, here is my tangle for today. Well, 2 tangles actually. I hope you enjoy.
Take care and ciao for now,

Tuesday, 14 June 2011

Tangle a day #3 & Happy Birthday Phil!!

Welcome to another tangle a day post. Before I get to that however, I want to wish my terrific nephew Phillip Cairn a wonderful 21st birthday. Phil has recently reached some milestones - he got engaged to his long-time girlfriend Eliza Tickner and just last week, completed his apprenticeship and is now a fully qualified bricklayer (and a very skillful one at that!!).

Happy happy birthday Phil, and many more!!!

Now, onto the tangle a day . . . Today's tangle is a mandala I recently tangled. Whilst browsing through a wonderful local bookshop called QVB, I found a fantastic book called " The Mandala Doodle Book". Published by Arcturus, ISBN 978-1-84858-053-4. It contains over 100 fantastic mandala designs, many of which are ideally suited to tangle artists.

After I scanned the image into my computer, I noticed that my scanner software had a command called "invert", so, ever curious, I clicked it and was amazed at what I saw. I thought it looked really cool, so I scanned the inverted image as well, and here they both are, for your enjoyment.
Edited to add: Blogger is playing up again today, so here is the link to my flickr photostream where you can see them full-sized: http://www.flickr.com/photos/21206021@N07/
Take care and ciao for now,

Friday, 10 June 2011

Happy Birthday to my wonderful Mum

69 years ago today, Mrs Wheaton gave birth to a baby girl named Charlene who would grow up to be creative and inspiring and also a terrific mum.

Happy birthday Mum. Wishing you a fabulous day

Love from Deanne
xxxx

Thursday, 9 June 2011

Tangle a day #2

Hello bloggers.

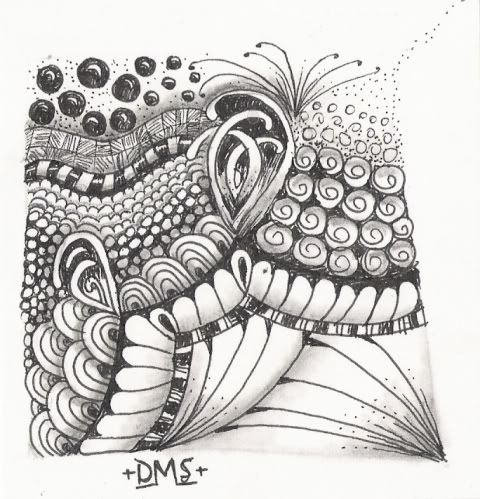
Here are a couple of tangles for you. They are just small ones from the beginning of my TangleBook.

Enjoy
Take care and ciao for now,

Wednesday, 8 June 2011

A Tangle a Day . . Celtic

I know the post says "a tangle a day.." but I don't usually manage the time to post every day (haha - as you can see by the huge gap between yesterday's post and the one before lol).

So, anyway, I have over 20 completed tangles in my TangleBook (my visual art diary) and I scanned them all last night so that I can gradually upload them onto here and also into the Zentangle (R) flickr photostream. You can click on both the below photos for a larger view.

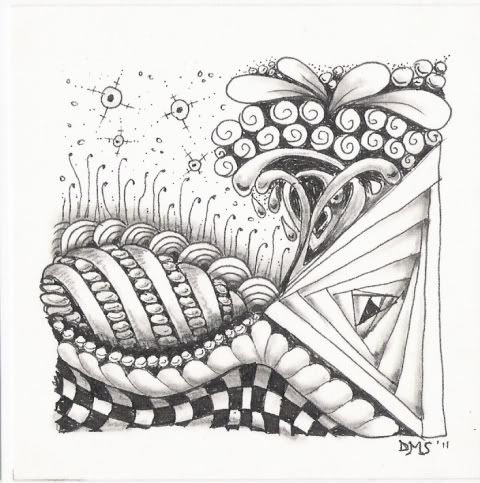
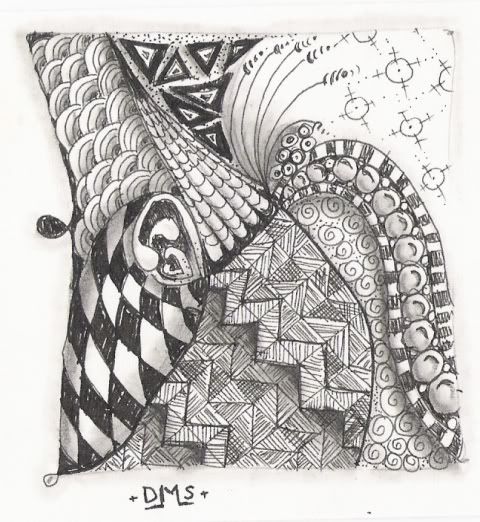
This first tangle was made by using the Celtic tangle as the string. I like working with larger areas and wanted to see how it would look tangled. I don't mind it. One of my friends said it reminds her of the ABC logo (haha thanks Jenni!).

For the tangle below, I drew a loooong string then drew over it with the Celtic tangle as well as another of my tangles "Braidz", then filled in with tangles. Instead of drawing the usual 4 dots and a box, I just drew a rounded kind of rectangular shape before drawing the swirly string.

I hope you enjoyed these tangles. I'll be back again soon with some more.

Thanks for stopping by. Take care and ciao for now,


Edited to add: for some reason blogger won't take you to a new screen with the images at their true size, so here is a link to my Zentangle (R) flickr stream where you can view them at 100%
http://www.flickr.com/photos/21206021@N07/

Tuesday, 7 June 2011

I am on TanglePatterns.com!

Some very exciting news! I recently came up with a tangle pattern that I was so excitied about that I sent of to Linda Farmer at Tangle Patterns.

Today in my inbox there was a link to how to draw Celtic - one of the patterns I submitted to Linda.

I am very excited lol. If you click >>> HERE <<< it will take you to the Tangle Patterns page where you can learn how to draw Celtic.

Take care and ciao for now,

Tuesday, 3 May 2011

A Zentangle Post

I have just discovered Zentangle (R)!! (doodling with purpose, or as I like to say, doodling with style). There is a difference between doodling (random scratchings on a page) and Zentangling. Its all doodling to me :)

I have been doing it for 3 days and I totally love love love it!! For information about this amazing emerging art form, you can visit the official website at www.zentangle.com and click on the links around the site. For a great index of (I think) all the patterns, go to TanglePatterns.com

I have ordered 4 (or was it 5?) of the official Zentangle (R)books from The Book Depository and am eagerly awaiting them. In the meantime, google and TanglePatterns.com are my friends. Wow, I wish Marie and Robert would come to Australia, as I can't afford to go to Michigan for the CZT (Certified Zentangle Teacher) course. My 2 girls have taken to this art like ducks to water too. We all have our own little Zen kit that I put together. Its wonderful!

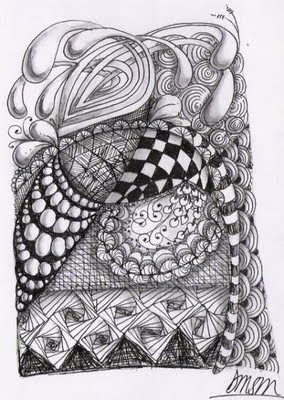
I am still learning (of course), but I really like the results so far. The image at the top is my fave and the most recent of my Tangles.

I hope you enjoy (I sure do :) )
Take care and ciao for now,

Thursday, 24 March 2011

nee naw nee naw crochet emergency!!

Long time no posts!!

here's my latest update:

Completed: 4 no-sew grannies (me, Zac, Em & Mad); one no-sew teeny granny squares cushion front (gotta sew the back on and find a suitable huge cushion to fill it).
Current projects: Rainbow chevron blanket for me; purple, blue & white chevron for my nephew & niece-in-law-to-be as a wedding gift (needs to be completed for 21s May!! eek); lots of teeny little flowers to decorate the front of some knitting needle and crochet hook roll ups (need to be completed before 1st April!).

Busy busy busy!!

Now I have a question, which I'll get to in a minute. As I said just up there ^ I am making some needle and hook rolls. I am selling these at a community market in a couple of weeks. I posed a question on my facebook wall yesterday(?) about how to decorate the outside. Some suggested stamping (nope, the fabrics are textured), some said ribbons (they are tied with ribbon) and Rachel (Pepper) stated the obvious answer I should have thought of in the first place - crocheting a couple of little flowers. Well, derr me lol.

So, now I have settled on the little flowers (which I am quite enjoying making, by the way), my next question is: which side - left or right - should I sew them to??

Do you (or would you) roll yours from the left to the right or from the right to the left??? I roll mine from the left side to the right, so my own would be decorated on the outside of the right-hand side. But does everyone roll that way? Would that put off any lefties out there from using one that rolls up that way? Or is it as case of "6 of one, half a dozen of another?"

Don't know what a needle roll is? HERE is a link to a search in google images which might help

I have posted this question over in the Little Scrapbook Shop forums too, in the "Hookers & Knitwits Unite" thread.

That's my dilemma. Can anyone help?

Take care and ciao for now,

Thursday, 10 March 2011

School Holiday Classes at Dean Park Community Development Project

Hey there bloggers!

Hope you are having a lovely day. I just wanted to let folks know that I am teaching some workshops in the April school holidays if people out this way would like to come. Place are limited so book in quickly before they fill up (I am only taking a max. of 10 people for each workshop).

The first workshop is on Wed 13th April 10am - 3pm and is an altered canvas picture frame

The 2nd workshop is on Wed 20th April 10am - 3pm and will be broken into 2 projects - shabby chic layout and matching card.

For details, click *HERE* or you can click on the link at the top of my blog under my banner, which will take you to the page telling you all about it.

Take care and ciao for now,

Wednesday, 9 March 2011

One Product 3 Ways - Stamps! at Little Scrapbook Shop

Good Morning Bloggers!!

Today I have a treat for you! I have just loaded a tutorial over at Little Scrapbook Shop, showing you 3 ways with stamps. Below is a peek at the cards I made. Details on how to get these results can be found in the forums over at LSBS. Click *HERE* to see the thread in the forum.

Create a background for punching out shapes:
Shrinky Dink Fun:
Paper Piecing:
Product information
~ stamps - The Greeting Farm, "Later Sk8er", "Journey", Buddies"; MME Lost & Found "Madison Avenue "Pretty""
~inks - Stazon Timber Brown
~ cardstock - Bazzill Basics
~ Patterned Papers: Echo Park "littlegirl", Kaisercraft
~ Brads
~ Flowers - Green Tara
~ Ribbons
~ Buttons
~ Punches - Martha Stewart - large butterfly, hydrangeas 3
~ Journaling pens - white & brown
~ The Crafters Workshop Template -
~ EK Success punch - retro flower large
~ Other tools: distressing too, heat gun, adhesives


Thanks for stopping by. Have a great day!!

Take care and ciao for now,