Sunday, 8 September 2013

Handmade Harbour Stamps - Humour

Howdy bloggers! Today I am sharing some cards I made using some great stamps from Handmade Harbour. You can see the cards larger by clicking on them, or right-click and open in a new tab.
The cute stamps are from the Humorous section. I love a stamp that puts a smile on my face!!

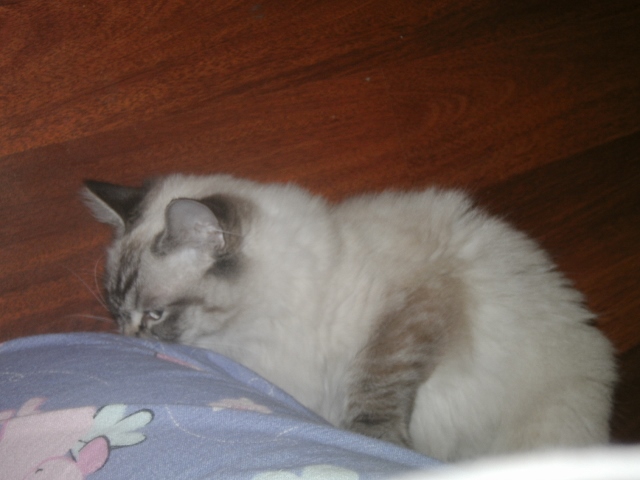
As you can see from the first photo, Smudge photo bombed again. Not only that, when I shooed her away, she decided it would be a fantastic idea to attack my leg and feet (and I'm ticklish!!). Yes, I'm still in my pjs, don't judge me (smile). She is a cat who absolutely hates to be ignored!!

So, onto the cards! I really like the sentiment on this stamp. I can see this getting a workout as my friends are getting older, along with me (hehehehe). I used a black marker to outline the words "good" and "longer", just to emphasise the point. 
Other stuff I have used: Printed onto Express-it specialty cardstock, coloured with Copic markers, a lovely flower, a skeleton leaf and patterned paper from DCWV.

This stamp I used for the next card appealed to me for a few of reasons - I really like cupcakes, I like the table and chairs that they are sitting at, plus, the humour appealed too. Before I show you the card, I need to share this terrific discovery I made when I coloured the image in:

I used watercolour pencils to colour this and there was NO BLEED of the printed ink. Wanna know why? Because I printed the images onto good quality (and by that I mean very expensive lol) watercolour paper. Its the kind I use to draw my Zentangles on. I was so thrilled to make this discover, because my preferred colouring medium, as everyone who knows me knows, is watercolour pencils. 

I use a couple of good brands of watercolour paper, but this particular one is made by Windsor & Newton. Its a Smooth surface cartridge pad, heavy weight, 100lbs/220gsm, smooth (santinee) A3 pad. I buy the biggest pad and cut the sheets to sizes I need, as it is the most economical way, I have found.

Ok, so now, you can look at the card. . . . . 
 
Other stuff I used: patterned papers, satin gross grain ribbon and a button.
You can't really see it in the photo, but I crimped the striped paper for a bit more texture.
I hope you enjoyed your visit today. Don't forget to check out the Midweek Papercraft Party over at Handmade Harbour Blog every Wednesday and remember, if you use a Handmade Harbour digital stamp, you could be in the running to win a prize of free digi stamps (see the blog for full info.)


Take care and ciao for now,

 

Friday, 30 August 2013

Handmade Harbour Midweek Paper Party - 2

I nearly missed mentioning the Handmade Harbour Midweek Paper Party - 2!

It's on right as I am typing this. If you want to play along and be in the running for a free digi stamp, be sure to pop over the the HH blog and check out the challenge. You will see my cards from my last post and a couple of other very nice cards from other members of the DT over there too.

Hope to see you over there!

Take care and ciao for now,
 

Wednesday, 21 August 2013

Cards for Handmade Harbour and a challenge with a prize

Hi everyone!

Today I am sharing with you some cards I've made with digital images from Handmade Harbour. I know I have said before how much I love their images, but I am going to say it again - I LOVE their images lol. I love the sketchy feel of the drawings by Wendy, and with so many different stamps available, there is something for nearly every occasion! Be sure to go and check out the Handmade Harbour shop!

Before I share my cards with you, I thought I would share a couple of pictures of my ragdoll Smudge "helping" me to take photos (she wanted to eat and play with them). I had to move to another spot hehehe. Thanks Smudge xx


Here are my cards - you can see there was a bit of a kitty cat theme happening for me (smile). You can enlarge the images by clicking on the photos.

1. Kitty asleep on the couch. I really like this stamp. I have made it 3D by printing several copies of the image (all the same size of course) and colouring selected areas, then cutting them out and layering them onto the bottom image (see the second photo).


 The image I used from Handmade Harbour was 108 Cat on armchair with patchwork quilts
For those who may be interested in the mottled background of this one, it was a very easy scrunch and smoosh background, done with paper and inkpads. I will put a quicky step by step up soon.

2. Kitty on the cushions. Another lovely stamp. I don't usually go for red and blue together, but I decided to go with those colours and then a grey cat. Seemed to work.

 Here is a close up of the card so you get an idea of the dimension.
The digital stamp used for this one is 035 Cat on cushions

 And last but not least, card no. 3 - another kitty on the couch. I thought a ginger tabby would be nice for this one, so that's what I went with. Again, red and blue cushions, but slightly different shades to the card above.
 Another close up so you can see the dimension.
The digital stamp used for this one is also  035 Cat on cushions


Other stuff used to make the cards:
   Textured cardstock, flowers, pin, brads, mini letter stickers, ribbons and mounting foam. The images were all coloured in with Copics.

Now, for the challenge & prize . . . Each Wednesday, over on the Handmade Harbour Blog, Wendy is putting up a challenge called the Midweek Papercraft Party  Sounds like fun, doesn't it? You are invited to join in the challenge and be in the running for a free digital stamp from Handmade Harbour. To play along, simply head over to the Handmade Harbour Blog on Wendesday and follow the instructions for the Midweek Papercraft Party.

Take care and ciao for now,

Saturday, 17 August 2013

Announcing my news : I'm on the Design Team for Handmade Harbour

 At last I can announce my announcement!

I was one of the lucky people to be asked to join in the awesome Design Team at Handmade Harbour!! Woot!! (see my badge over there on the right? Nice, isn't it?? hehehe)

I am very excited! Its been a while since I have been on a DT and Handmade Harbour has such a terrific range of images to choose from. My mojo has been on the go again since I found them.

So, what's the DT all about? We will be designing for this wonderful site for challenges that Wendy will be putting up each week. You (the viewer/crafter) will have the opportunity to participate in the challenges and even be in the running for PRIZES!! I like prizes! I am sure you do do. Challenges will begin this month and will go up on the Wednesday. To be sure you don't miss out, why not subscribe to the HH blog.

To find out more, be sure to pop over to the Handmade Harbour blog, and check out the Digital Stamps Store too.

If you are like me, and you have other crafty interests as well, you might also enjoy Handmade Monday - its a linky party where you get to link your own crafty things or follow links to other crafty peoples' crafty things. This excerpt is taken right off the blog "It’s got a bit of a community feel to it and has been likened to an online coffee morning.  If you blog about something creative that you think fits in with the handmade ethos, you’re very welcome to join in. You don't need an invite!"

So, be sure to pop over and have a look. You won't be disappointed.

Take care and ciao for now,
 

Monday, 12 August 2013

Handmade Harbour - Adding a button to your blog sidebar (and a free digi stamp!)

Hi all!

You know how much I love stamps. Well, my new favourite place to get digital stamps online is Handmade Harbour. Well, Wendy over at HH has produced a shiny new blog badge for her online shop. If you like Handmade Harbour and are kind enough to want to help spread the work and would like a shiny new badge on your blog (and a free digi stamp), this is what to do (if you already know what to do, just scroll down to find out how to get your free digital stamp):

Handmade Harbour digi stamps


Click on the code box under the blog button above and scroll down until you've highlighted all the code. Right click and select Copy.

On your blog's main page (the one viewable to the public), click on Design in the top right corner, then Layout. Or, if you are already on the dashboard, just click on Layout.

Depending on the layout of your blog, you probably have a few places showing up saying Add gadget. One of these will be where you can add your button. Click on Add gadget.

In the box that pops up, scroll down until you find the one that says HTML/Javascript. When you click on that, another box comes up. In the larger of the two boxes showing, paste the code you copied earliler (right click in the box and select Paste). In the smaller box, you can type a heading if you choose to, such as Buy Digi Stamps, or I love... or you could leave it blank. It is easier to organise your gadgets if you have a heading though.

Clilck Save. 

After you've saved it, you'll be back to the layout screen. If you choose, you can move around your buttons just by dragging them. You'll need to click Save Arrangement to finalise it.

Check it's all working fine by clicking on View Blog. 

And you're done! 

If you need to adjust your blog column widths to accommodate your new badge, just go to Templates then Adjust Widths. 

Have you added the Handmade Harbour blog badge to your blog? Email wendy to tell her about it (remembering to include your blog link): wendy@handmadeharbour.co.uk and she'll send you a digi stamp to say thank you. Please be patient - unlike the stamps you buy, this one will be sent manually. She'll be as quick as she can though!


Here's a disclaimer in case Wendy gets overwhelmed: This free digital stamp offer is a temporary one and may be removed at any time. It only applies to the Handmade Harbour shop badge and NOT to the Handmade Monday badge.

Take care and ciao for now,

Monday, 29 July 2013

Tutorial - Straight Stick Trick

Hello and welcome to one of hopefully many new blog posts to come.

I was lucky to be asked to create a tutorial for Handmade Harbour and Totally Tutorials blog. The only catch - I had to want 5 free digital images. Gee, that was a hard one to accept (NOT!) hehehe.

So, here is my tutorial for you using THIS wonderful image from Handmade Harbour. My tute will show you a simple but excellent way of making sure your card layers line up perfectly every single time - the "Straight Stick Trick". I have been teaching this "trick" to people attending my card classes for years and they love it. I have heard that this is also a technique taught at design school. 

First of all, here is my little kitty Smudge, helping me to colour the image by laying all over my spot lol. She loves to sit next to me while I am working at my craft desk (that's why that little pink blanket is there - she know's that's her spot).

Here is the card I made. I actually made a different card, which was almost the same, except silly me, didn't have an image from the lovely Wendy at HH. oops. So, card re-do and voila! here we are.
The image has been coloured in with Copic Markers. I actually prefer using watercolour pencils and a waterbrush, but the printer ink is water-soluble, so the Copics work best. I have also used Copic paper.

Ok, my first tip: I actually put my tape on my wrist like a bangle, as I find I have greater control. I also tear my tape, as opposed to cutting, for 2 reasons; 1. cutting the tape gums up your scissors and 2. it's quicker and easier just to tear it.


STEP 1: First things first - apply the tape on all 4 sides of the paper or cardstock you are adhering. Also, make sure to place a strip of tape diagonally across the centre of the piece. This centre piece is very important, as it holds the piece in place while you remove the bits from the sides.

STEP 2: Next, peel back and fold a small portion only of each piece of tape backing around the edges of your card/paper. Be sure to press down so the tape backing is folded out at a right-angle. Remove the tape backing entirely from the centre diagonal strip.

STEP 3: Here, you can see I have plonked the prepped paper onto the card. The peeled backing acts as 'feet' and suspends the paper over the card, so the sticky centre isn't touching the card base at this stage. This is the time when you line the paper up exactly where you want it to be. 

Once you are happy with the placement, you press the middle so the exposed centre tape adheres to the card base. You need to keep your fingers pressed to the middle while you peel away any 2 of the exposed backing tapes.


STEP 4: You can now release the paper and peel the remaining backings from the patterned paper.

In this photo, you can see how the stamped image is suspended by the peeled and folded tape backing.

Simply repeat all the steps to adhere the stamped image in place.


Ta-da! You have now got a perfectly lined up image and mount on your card. yay!


 And here is the card finished. 
And that's all there is to it. I hope you enjoyed this little tutorial. It is very handy to know, especially if you are very particular about your edges all lining up perfectly.

Here's a list of the materials I have used
Stamps: 043 Sewing Machine (Handmade Harbour), Sew Suite stamp set (Stampin' Up!)
Markers: - Copics
Cardstock and patterned paper - Die Cuts With a View
Other: ribbon, paper flowers, buttons, letter stickers, round adhesive diamantes, Kindy Glitz, white gel pen for "highlight" on sewing machine.

Take care and ciao for now,


Monday, 3 June 2013

Digital Stamps from Handmade Harbour

Hi all!!

I have some images to share with you all today. After a loooong drought, I have finally gotten back into cardmaking again, with the help of some fabulous images created by Wendy over at Handmade Harbour.

Wendy has been designing some totally awesome digital images, with images for just about any occasion, which you can purchase at the Handmade Harbour Digital stamps store

These are just 4 of the cards I have made so far. I have another 4 on the go and to be completed very soon.


I would definitely recommend you check our the images on Wendy's site if you are a fan of digital stamps. They are really lovely and perfect for cardmaking, scrapbooking or anything really.

Take care and ciao for now,
 

Wednesday, 27 March 2013

New Look Coming Soon . . ..

Hello my very neglected blog followers...

I have sadly been neglecting my blog for over 12 months now. I lost the enthusiasm I had when I first started and lost my passion for crafting. I have moved in a different direction creatively, and have re-discovered my love of crochet. I still make cards but my heart isn't in it like it used to be. That being said, I still love to play with inks and stamps and I still teach a wonderful group of ladies cardmaking every week.

Anyway, I am going to change the look of my blog - orange no longer does it for me I'm afraid and I would really like it to reflect my current creative journey, which is more crochet than papercrafts, although its still all about colour, so maybe that's the way I will go.

Anyway, thanks for sticking around. Now all I have to do is remember how to change my blog. hahaha.

Take care and ciao for now,


Friday, 11 November 2011

Are you a Domestic Goddess? Even a little?

My answer to this one is . . . I'm trying to be.

Housework has never been my forte (well, except when I was a single mum and it was just Zac and me. I worked full time, so it wasn't so hard, as we were really only home on weekends).

However, I have decided that its time for me to get up off my lazy butt and becone the mum I always wanted to be. You know the type - always has yummy stuff cooked for the kiddies for after school snacks and always has something good for them in their lunch box. My mum worked full time outside of the home, as well as doing ALL of the domestic yucks at home (we were lazy kids I think, except for chore-day-saturday), so I didn't really have a role model for the stay at home thing, which is probably why I suck at it hehe. However, my mother always made the best cakes and slices in the world and her potato salad and egg&bacon pie are to die for!!!

I am starting my new self off with baking.

I found a fabbo website for SAHM mums, www.stayathomemum.net.au and it has plenty of frugal recipes for the domestically and financially challenged (like me lol). The recipes are easy, economical and the kids will love them.

Jenni also passed onto me a recipe for quick, easy muffins, that she found somewhere in cyberland. I am going to tweek it a bit, cos they are just a tad dry for my taste - I prefer a moist muffin. THe basic recipe would be awesome for savoury muffins (like bacon and cheese or something), but I like my sweet muffins a little wetter.

Here is the muffin recipe:

2 cups SR flour
1 cup milk
1/2 cup sugar
1/4 cup oil
1 egg

I will be increasing the oil to 1/2 cup and increasing the sugar to 2/3 cup for sweet muffins plus, I added a little more milk.

You add whatever ingredients you like to this. I rather like apple muffins, so I added a grated apple and some mixed spice (next time I will use 2 apples and a whole teaspoon of mixed spice and also 1/2 cup of oats)

Yum yum.

So, I am tackling the cooking side of domistic goddess-hood first. The housework is a never-ending battle with the kids, and frankly, life is just too short.

So, what about you - do you have something goddess-worthy you can share with us mere mortals? I sure hope so, because I need all the help I can get.

Take care and ciao for now,

Sunday, 6 November 2011

Zentangle at the Diva's blog - prizes up for grabs

Howdy folks,
I cannot believe its been so long since I have been on here!! Ah well.

Today I am sharing with you details of a fantastic competition over at The Diva's blog.
Here is the link to see the comp and the great Zentangle prizes up for grabs.
==>> Passing the Celebration on to You (us)
Be sure to pop over, read the rules and enter to win. Gotta be in it to win it!!!!

Take care and ciao for now,

Saturday, 17 September 2011

Crochet Slouchie Beret

Howdy bloggers,
Long time no see!! Been busy and pre-occupied and a bit lazy. Soz.

I thought I would share a photo of what I have been making lately - slouchie berets!!! I love these - so easy and quick to make (I made 4 in the last week or so). This one is modelled by my darling Emily. Check out those blue blue eyes!!

It is green as that is the school colour. This is for her to wear to school in the cool months. Maddie has one exactly the same (except a little larger). I made one for myself, trying to jig to pattern and it was all wrong. So I unpicked it, rejigged and it was still all wrong. No way was I unpicking again, so I gave it to Em, who gave it to her friend. Went to a nice home and the recipient loves it. I also made one for Jenni, who also loved hers.

I now have 2 more to make - one for my hubby in purple (started but still going) and another school coloured one for one of Emily's friends.

The pattern is one that one of my Wednesday Knit and Natter ladies let me copy, which she found on the internet. Hang on, I'll find the link just in case anyone else out there wan't to play. . . OK, here you go Easy slouchie hat. The pattern is for one skein, but it depends on the weight of your yarn. For Jenni's hat, I used 2 skeins of Little Grins yarn (50g each). Emily's and Maddie's hats used less than one large (100g I think) ball of 8ply acrylic. I crochet with a loose stitch btw.

So, without further ado, here is Em modelling the lovely Easy slouchie hat


Take care and ciao for now,

Tuesday, 16 August 2011

Tangle a Day #8

Hello everyone!
I have been playing with stencils and zentangling in the last couple of days. I love this kitty - it reminds me so much of my kittycat Jack!!!

I really enjoyed filling the stencil in with Nzeppel (an official Zentangle® pattern) then tangling around it. I do prefer the 3½" square where he doesn't have an aura but never mind.

Enjoy.
Take care and ciao for now,

Thursday, 11 August 2011

Published again. Yay for me.

Yay for me! Linda Farmer of TanglePatterns.com has just published another one of my tangle patterns, called Diamonds and Squares. I am excited that it is different enough from all the other stuff out there, and that Linda likes it enough, to include it on her website.

To see the step by step how-to-draw this pattern, you can pop over to the TanglePatterns.com website. Click "deannesm" in the tag cloud on the left to bring up my patterns. The patterns are also listed alphabetically, so you can click on the "D" along the top of the page and it will bring it up too.

There are many possibilities for shading variations, depending where you apply the solid colour (Linda has a really interesting variation, and I show you another in my steps). The basic pattern makes a really great background (IMHO) and I have used it on the ATCs below (which are for a swap over at the Zentangle Inspired Art yahoo group)
(you can click on the image for a larger view)

I will be putting my published (and some of my unpublished) patterns on here in the near future, but I like to have the reference to the TanglePatterns site, as it is an excellent resource for tanglers.

Have a marvelous day!

Take care and ciao for now,